
A smartlink should do one job well: send fans to the right music page with as little friction as possible. If I want it to help my branding, I keep three things tight: one goal, one clear layout, and one message that fits the release stage.
Here’s the short version:
- Pick one goal first: pre-save, stream, or ticket sale
- Only show live destinations: too many choices can hurt clicks
- Match the page to the release: artwork, colors, and tone should line up
- Put the top action first: most fans will tap on mobile
- Keep copy short: artist, title, one line of context, one CTA
- Test every link before launch: especially mobile buttons and tracking
- Use click data after launch: move top platforms up, cut weak ones
A few numbers matter here. Pre-save campaigns often start 3 to 4 weeks before release. Then, on release day, the link should switch from pre-save to live streaming. That timing alone can change how many people finish the action.
If I had to sum up the whole article in one line, it would be this: make the page look like the campaign, keep it short, and measure what fans click.
For most releases, I’d think about the page in two simple modes:
| Page type | Best for | What it includes | Main tradeoff |
|---|---|---|---|
| Simple page | Release day traffic, bio links | Cover art, short text, platform buttons | Fewer extra actions |
| Expanded page | Pre-save pushes, bigger campaigns | Art, copy, tracking, email capture, more tools | More for fans to process |
I’d also match the wording to the campaign moment:
| Campaign stage | Best CTA style | Example |
|---|---|---|
| Pre-release | Anticipation | Pre-save before Friday |
| Release day | Direct action | Listen Now |
| Catalog | Context-based hook | Stream the track from our new vinyl drop |
So the core idea is simple: plan first, design second, test last. That keeps the smartlink on-brand without turning it into a cluttered page.
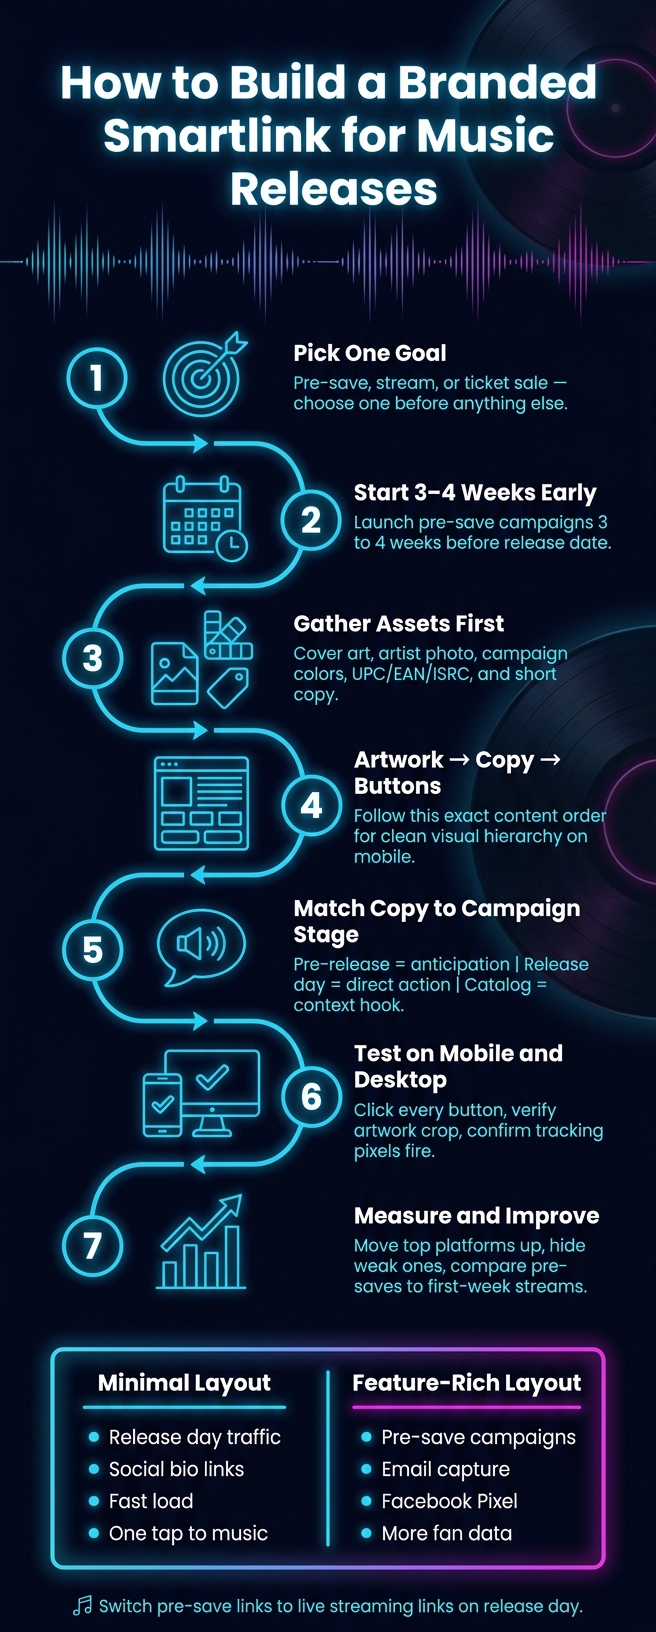
Smartlink Setup Process for Music Releases
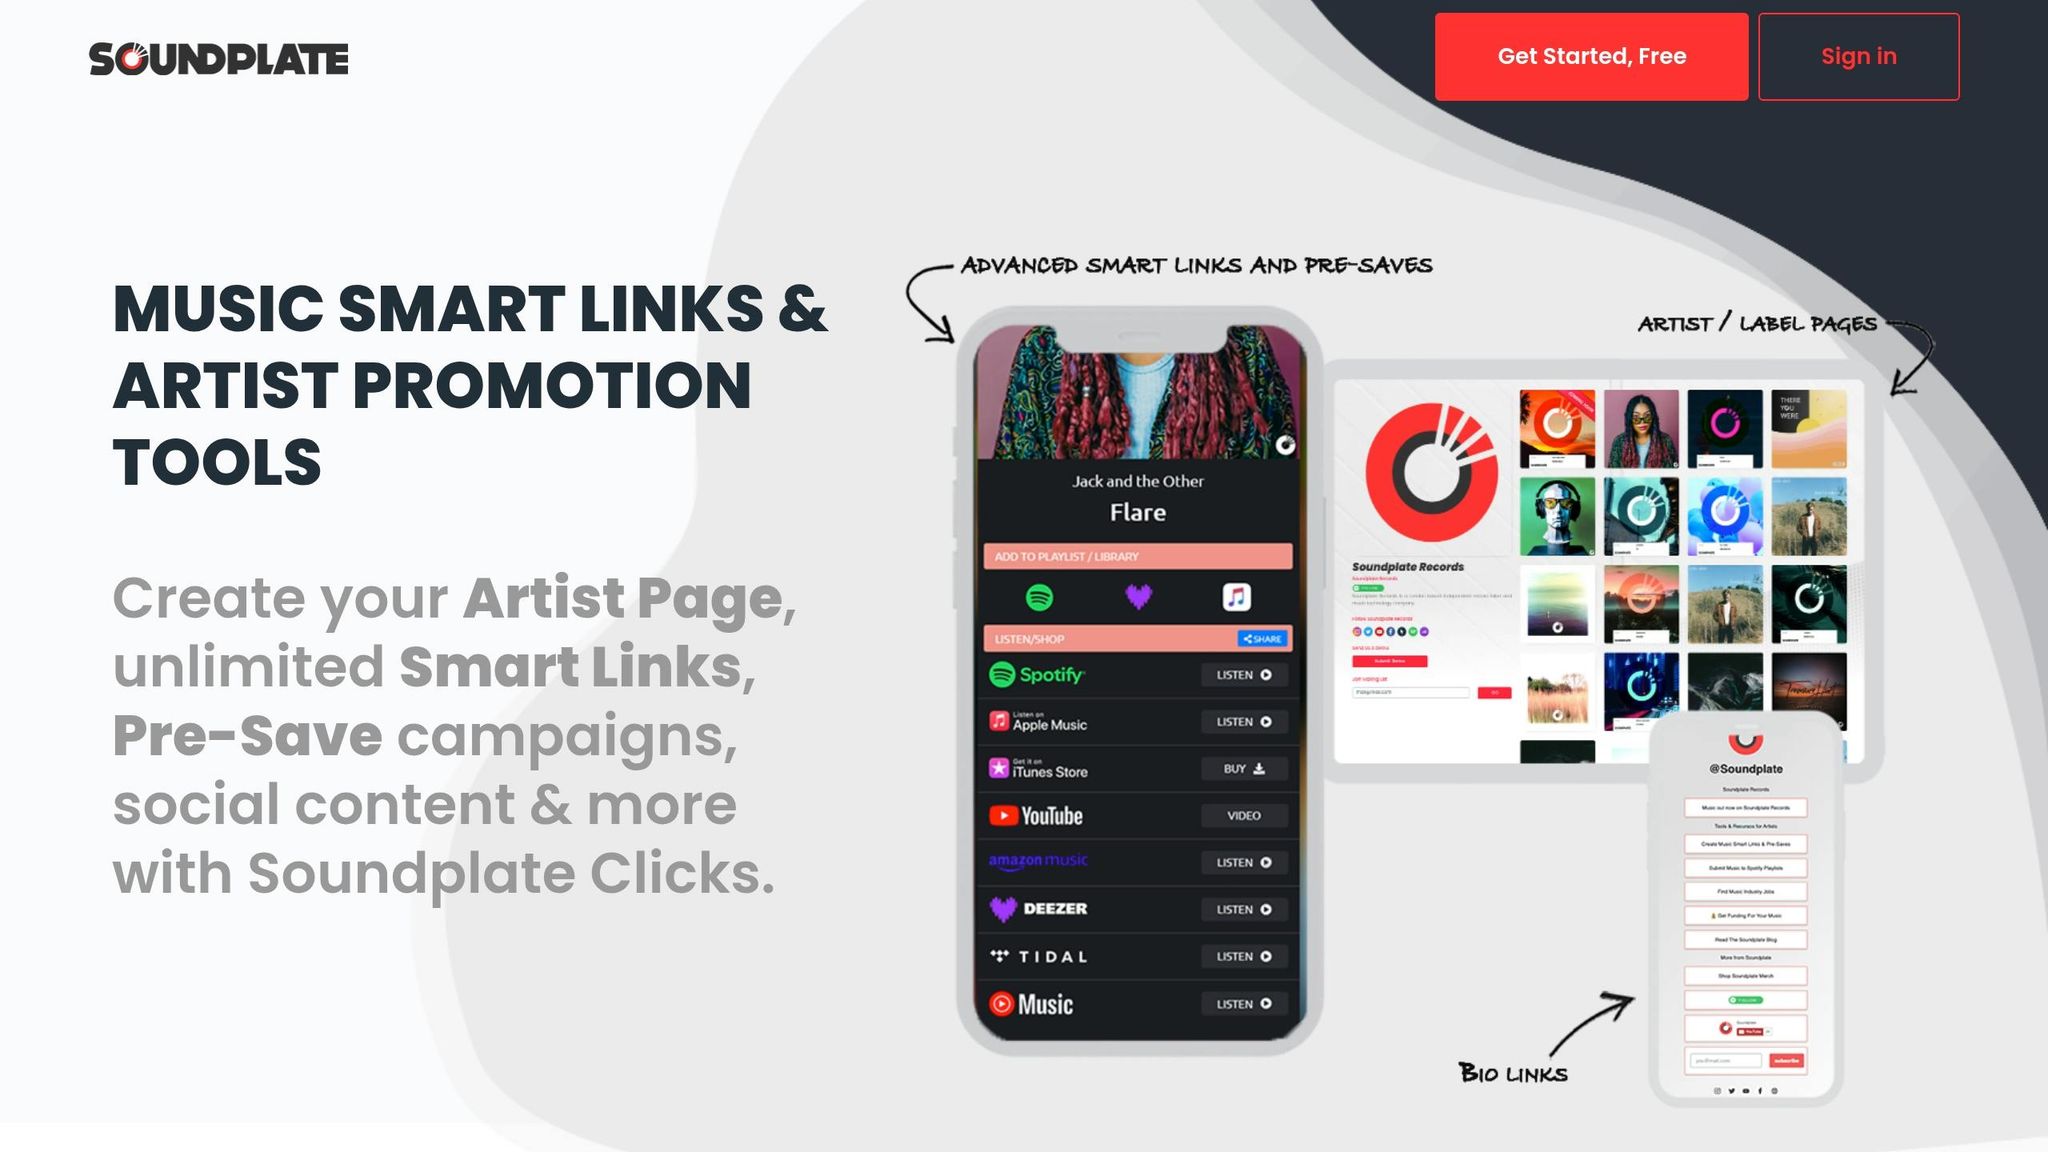
How to customize your music smart links on Soundplate Clicks
sbb-itb-888513b
Plan the Page Before You Customize It
Start by giving the page one clear job: pre-saves, streams, or ticket sales. A branded smartlink works best when every part points to a single action. That one goal shapes the destinations you add, the order they appear in, and the copy you write.
Choose One Goal and the Right Destinations
Pick the goal based on where the release is in its rollout. Pre-save campaigns tend to work best when they begin 3 to 4 weeks before the official release date, which gives the page time to build momentum before release. Once the release is live, switch the smartlink to direct streaming links so people who arrive later can still get to the music fast.
Only include platforms where the release is actually live. If fans have to scroll too much or sort through extra choices, you lose them. Keep the page short so they can act in one tap.
Prepare Brand Assets and Set Content Order
Get your assets together before you open the editor. At a minimum, that means high-resolution cover art, an artist profile photo, campaign colors, and a short release description. If you already have your UPC, EAN, or ISRC, Promoly can auto-fill artwork, metadata, and links, which helps cut manual errors.
Once you have everything in place, keep the content order simple: artwork first, copy second, buttons third. It’s a clean flow. Fans see the visual first, get the context next, and then hit the action.
| Asset Category | What to Prepare |
|---|---|
| Visuals | Cover art, artist profile photo, campaign colors |
| Identifiers | UPC, EAN, or ISRC |
| Copy | Short release description, CTA button text |
| Tracking | Facebook Pixel ID for paid social campaigns |
With the assets ready, you can move straight into layout and copy.
Customize the Visual Design for an On-Brand Page
With your assets ready, the next move is shaping a page that matches the release brand. Smartlinks can be customized with artist photos and brand colors so the page looks and feels like the same campaign.
Set Artwork, Colors, and Layout
Use the assets you already gathered to make the page feel tied to the release, not like a generic template. Start with your release artwork as the main visual. Paste a UPC, EAN, ISRC, or streaming URL to auto-fill artwork and metadata.
Then carry over the brand colors you’re already using for this release. Apply them to buttons and accents, and pick a high-contrast button color so the main action stands out on mobile.
Order Buttons for Speed and Mobile Use
Put buttons in priority order, with the main destination first. The primary action should sit front and center so it’s easy to tap on a phone. Use direct labels like "Stream on Spotify" or "Buy on Beatport" for this campaign. Hide unreleased platforms.
Keep the layout clean so the page stays easy to use on mobile.
Once the visual hierarchy is in place, match the copy to the release stage.
Minimal vs. Feature-Rich Page Layouts: A Comparison
The right layout depends on your campaign goal. A minimal page moves fans to one destination fast. A feature-rich page gives them more choices and more data, but it also asks more from them up front.
| Feature | Minimal Layout | Feature-Rich Layout |
|---|---|---|
| Primary Focus | Speed and direct click-throughs | Engagement and data collection |
| Visual Elements | Release artwork and platform buttons | Artwork, artist bio, and embeddable players |
| Interactive Tools | Simple link tracking | Pre-save counters, email capture, and Facebook Pixel support |
| Load Speed | Optimized for near-instant mobile loading | May vary depending on embedded players and widgets |
| Best Use Case | Social media "link in bio" for quick navigation | Major release campaigns and pre-save pushes |
Use the minimal layout for release-day traffic. Go with the feature-rich layout when the campaign needs extra actions or tracking. With the layout set, the next step is copy that supports the same single action.
Write Messaging That Matches the Release and the Audience
Once the page looks right, the copy has one job: get fans to the main action fast. When the artwork and button order are already doing their part, the words should back that up, not pull in another direction.
Use Short Copy That Supports the Main Action
Smartlink copy should support the design, not fight with it. Keep the artist name and release title easy to scan, then add one short description line that gives fans quick context.
Make the headline easy to read, especially on mobile. One sentence is enough to tell fans what the release is without taking attention away from the main CTA. Use clear, genre-aware button text like "Listen Now", "Stream on Spotify," or "Tune In." Put the main action up front, both in the first line and in the button text.
Tone matters too. A punk band and a jazz trio shouldn’t sound the same, and generic wording is easy to scroll past.
After the tone and button text are in place, the next step is to match the message to the campaign stage.
Adjust Messaging for Pre-Save, Release Day, and Catalog Campaigns
Different campaign stages need different copy. Pre-save pages should lean into anticipation. Phrases like "Be the first to hear it" or "Pre-save before Friday" give fans a clear reason to act now.
As release day gets closer, the message should move from anticipation to urgency. Once the music is live, switch to direct listening language like "Listen Now".
Catalog pages need a different angle. Countdown-style wording doesn’t fit there. Instead, lead with a clear hook, such as playlist placement, a milestone, or a vinyl release.
Urgency-Led vs. Story-Led Copy: A Comparison
These three message styles fit different moments.
| Messaging Type | Best Used For | Key Characteristics | Conversion Goal |
|---|---|---|---|
| Urgency | Final 48 hours before release; casual fans | Scarcity-focused, time-sensitive, direct | Immediate pre-save or stream |
| Story | Early campaign stages, 3–4 weeks out; core fans | Personal, behind-the-scenes, emotional | Long-term loyalty and engagement |
| Action | Release day and beyond | Clear, platform-specific, no friction | Immediate listening and royalty generation |
"A genuine ‘I’ve been working on this for months and I’d love you to pre-save it’ outperforms a generic graphic every time."
Publish, Test, and Improve the Smartlink
With the copy and visuals locked in, the last step is simple: get the page live, check every link, and use the first batch of data to make it better.
Use Branded URLs and Test Every Destination
Before you share the page, customize the URL. A branded path like yourlabel.com/songtitle can help click-through rates and make the link easier to remember.
Next, paste a UPC, EAN, ISRC, or a direct streaming URL into your smartlink builder. Promoly can pull in artwork, metadata, and platform links across major DSPs.
After the metadata loads, check the details one by one:
- Make sure the artwork crop looks right
- Confirm the release date is correct
- Check that the artist name appears exactly as intended
- Verify that every platform link is live
Then test the page manually on both mobile and desktop. Click every button. Open every destination. Make sure the layout still looks clean on a smaller screen. If you’re using Facebook Pixel for retargeting, confirm the tracking fires before launch. And if any links point to unreleased music, turn those off before the page goes public.
Review Click Data and Improve After Launch
Once the smartlink is live, the first data tells you where fans are getting stuck and what they’re choosing. Track visits, clicks by platform, and conversions.
If one service gets most of the clicks, move it closer to the top. If another barely gets any action, hide it and keep the page tighter. Small changes like that can clean up the path and make the page easier to use.
For pre-save campaigns, compare pre-saves against first-week streams. That gives you a clearer read on whether the campaign turned early interest into listening. On release day, switch the smartlink so it sends people straight to the live streaming pages instead of the pre-save URL.
Conclusion: Keep the Page Simple, Branded, and Measurable
A good smartlink usually comes down to a handful of repeatable choices: one clear goal, brand assets ready before setup, mobile-friendly visuals, copy that fits the campaign stage, and tracking in place from day one.
After launch, let the click data do the talking. Reorder buttons, remove weak platforms, and tighten the copy based on what fans actually do. Do that for every release, and the page becomes faster to build and easier to tune up each time.
FAQs
How many links should I include?
There’s no fixed limit. Promoly supports unlimited links in your campaigns.
With a single URL, barcode, or URI, Promoly can automatically find matching links across nine major streaming platforms and add the right buttons to your landing page. You can also switch specific platforms on or off and add custom links to match your branding.
When should I switch from pre-save to streaming?
Switch your smartlink from a pre-save page to a direct streaming link on your official release day.
Once your music is live, pre-save links stop doing the job you need them to do. At that point, people shouldn’t land on a page asking them to save a release that’s already out. They should be able to hit play right away.
Updating the link makes that happen. New visitors can find your release and start listening without extra steps. With Promoly, you can make the switch and keep your branding the same.
What should I test before publishing?
Before you publish your smartlink, take a minute to review the campaign details and make sure all imported info is correct. Check the artwork, release date, catalog number, and metadata.
Also make sure your track shows up on the streaming services that matter for this release. Then test any toggled links, custom messaging, and pre-save dates so the landing page lines up with your branding.